Game Night Throwdown
On the last Sunday of June, I had a buddy over for a small game of ESR. We played another game working through the rules.
Situation
We just pulled some stuff out of our kits for a meeting engagement. I decided to put our forces into New Recruit, refer to the Order of Battle below. (I wish I had done this before we started our game — I would have probably dropped some of the Frech forces to make it a bit more balanced, ed.)
Pregame, Game Setup The Map

Order of Battle
Russia – [210 Threat, 54.5 Cohesion]
Force Commander [2 Cohesion, 2 Threat]: Commander [2 Cohesion, 2 Threat]
• 1x Bennigsen [2 Cohesion, 2 Threat]
RU Grenaderskaya Diviziya [13 Cohesion, 52 Threat]: Commander [1 Cohesion, 1 Threat]
• 1x RU General-Leytenant Grenaderskaya Diviziya [1 Cohesion, 1 Threat]
• 10x RU Grenaderskaya [1 Cohesion, 3.5 Threat]
• 2x RU Legkaya Artilleriyskaya [1 Cohesion, 8 Threat]
RU Kirasirskaya Brigada [8.5 Cohesion, 28 Threat]: Commander [1 Cohesion, 1 Threat]
• 1x RU General-Mayor Kirasirskaya Brigada [1 Cohesion, 1 Threat]
• 6x RU Kirasirskiy [1 Cohesion, 4 Threat]
• 3x RU Donskoy Kazachiy [0.5 Cohesion, 1 Threat]
RU 1st Pehotnaya Diviziya [15.5 Cohesion, 64 Threat]: Commander [1 Cohesion, 1 Threat]
• 1x RU General-Leytenant Pehotnaya Diviziya [1 Cohesion, 1 Threat]
• 4x RU Yegerskiy [1 Cohesion, 4 Threat]
• 8x RU Pehotniy [1 Cohesion, 3.5 Threat]
• 1x RU Batareynaya Artilleriyskaya [1.5 Cohesion, 11 Threat]
• 1x RU Legkaya Artilleriyskaya [1 Cohesion, 8 Threat]
RU 2nd Pehotnaya Diviziya [15.5 Cohesion, 64 Threat]: Commander [1 Cohesion, 1 Threat]
• 1x RU General-Leytenant Pehotnaya Diviziya [1 Cohesion, 1 Threat]
• 4x RU Yegerskiy [1 Cohesion, 4 Threat]
• 8x RU Pehotniy [1 Cohesion, 3.5 Threat]
• 1x RU Batareynaya Artilleriyskaya [1.5 Cohesion, 11 Threat]
• 1x RU Legkaya Artilleriyskaya [1 Cohesion, 8 Threat]
France – [244.5 Threat, 61 Cohesion]
Force Commander [2 Cohesion, 5 Threat]: Commander [2 Cohesion, 5 Threat]
• 1x Marmont [2 Cohesion, 5 Threat]
FR Corps Réserve/Parc d’Artillerie [5 Cohesion, 34 Threat]:
• 2x FR 12-pdr Réserve d’Artillerie [1.5 Cohesion, 11 Threat]
• 2x FR 6-pdr Artillerie à Cheval [1 Cohesion, 6 Threat]
FR 1st Division d’Infanterie [14 Cohesion, 52.5 Threat]: Commander [1 Cohesion, 3 Threat]
• 1x FR Général de Division d’Infanterie [1 Cohesion, 3 Threat]
• 1x FR Infanterie Légère [1 Cohesion, 4 Threat]
• 11x FR Infanterie de Ligne [1 Cohesion, 3.5 Threat]
• 1x FR 6-pdr Artillerie à Pied [1 Cohesion, 7 Threat]
FR 2nd Division d’Infanterie [14 Cohesion, 54 Threat]: Commander [1 Cohesion, 3 Threat]
• 1x FR Général de Division d’Infanterie [1 Cohesion, 3 Threat]
• 4x FR Infanterie Légère [1 Cohesion, 4 Threat]
• 8x FR Infanterie de Ligne [1 Cohesion, 3.5 Threat]
• 1x FR 6-pdr Artillerie à Pied [1 Cohesion, 7 Threat]
FR 3rd Division d’Infanterie [14 Cohesion, 54 Threat]: Commander [1 Cohesion, 3 Threat]
• 1x FR Général de Division d’Infanterie [1 Cohesion, 3 Threat]
• 4x FR Infanterie Légère [1 Cohesion, 4 Threat]
• 8x FR Infanterie de Ligne [1 Cohesion, 3.5 Threat]
• 1x FR 6-pdr Artillerie à Pied [1 Cohesion, 7 Threat]
FR 1st Division de Grosse Cavalerie [12 Cohesion, 45 Threat]: Commander [1 Cohesion, 1 Threat]
• 1x FR Général de Division de Grosse Cavalerie [1 Cohesion, 1 Threat]
• 8x FR Cuirassiers [1 Cohesion, 4 Threat]
• 2x FR Chevau-Légèr-Lanciers [1 Cohesion, 3 Threat]
• 1x FR 6-pdr Artillerie à Cheval [1 Cohesion, 6 Threat]
Play by Play
At game start, Marmont assigned the Corps artillery reserve to the 3rd Infantry Division. Marching orders were for the three French divisions to enter on the three roads, assigning 1st Division to the northernmost road, 2nd Division to the southernly eastern road, and the 3rd Division with the Corps artillery to the southern road, following the Cuirassiers.
Bennigsen assigned his forces to the western road network. The northern road was assigned to the Cuirassiers. He assigned the Grenadier division to the southern road with the 2nd Division on its flank. The 1st Division was assign the remaining western road.
The first three turns ran smoothly for both sides. No missed command rolls. It looks like everyone was looking for a fight!
Turn one, each side issued objectives. Turn two, both Marmont and Bennigsen rolled to activate their objectives, and both succeeded without delay. Both commanders then set move orders for all of their Formations.
Turn 1 Objective Placements.
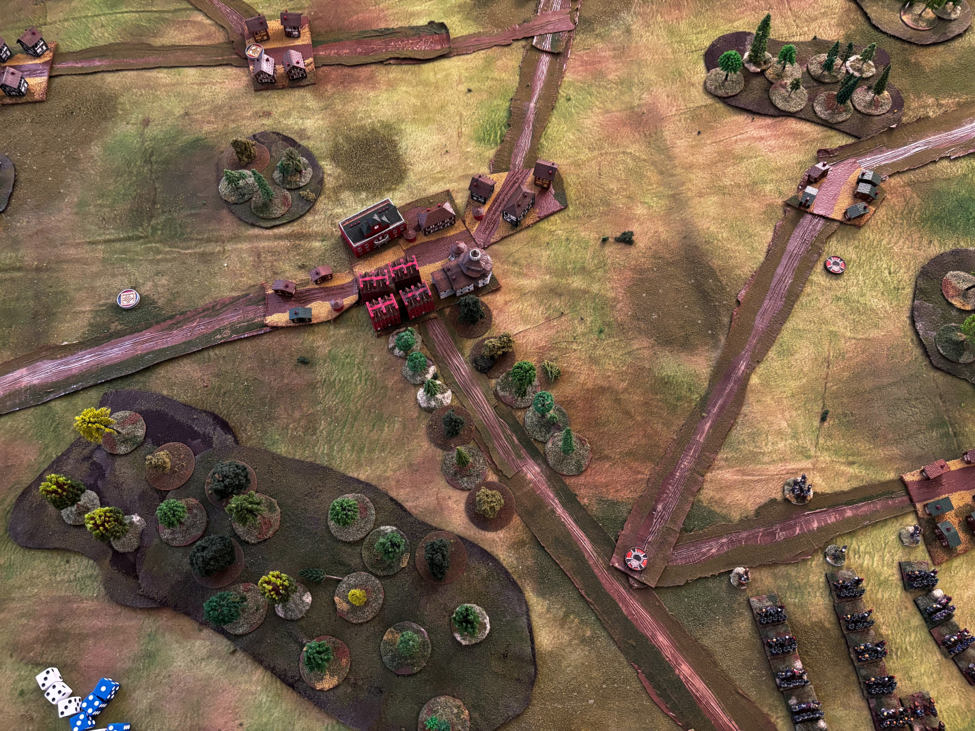
Turn 2 Assigning French Objectives
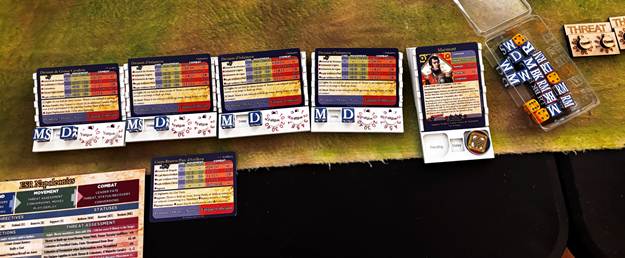
Turn 2 Assigning Russian Directives
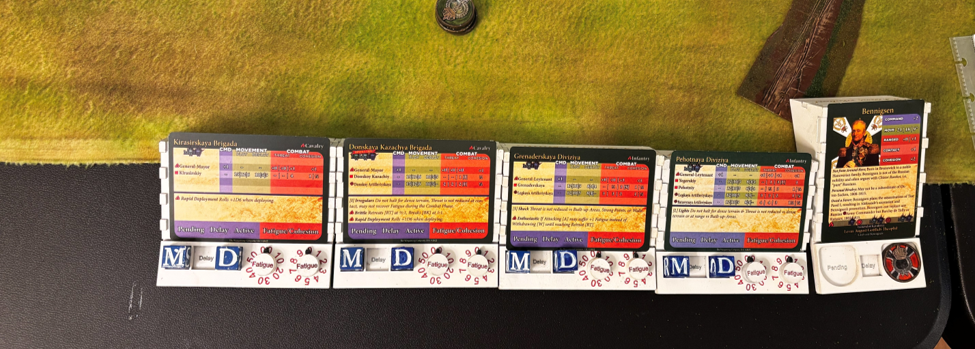
Turn 3 both commanders luck continued and all directives arrived without delay. This is the French advance. In the middle bottom of the picture, the infantry are still off board waiting for the cavalry to advance. This is viewed from the south.

Turn 3 the Russian advance starts. This is the view from the south.
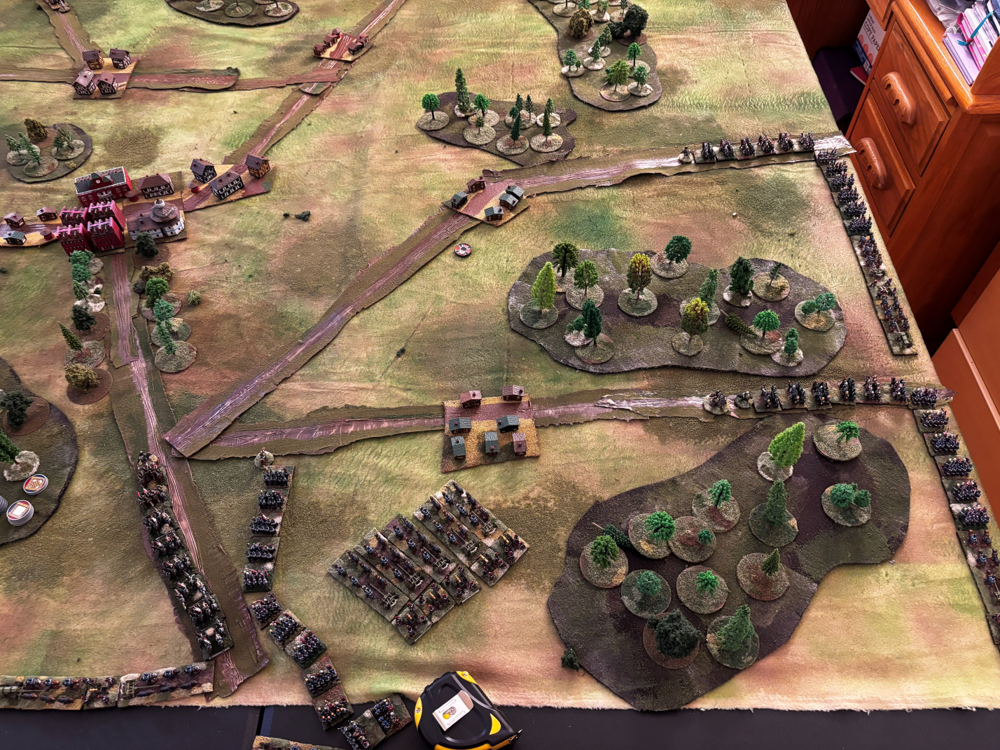
Turn 3, the Russian advance viewed from the Russian western board edge.

Turn 4, neither commander is adjusting their plans. Bennigsen is letting his plans develop. While the French are visible, they are still many miles away.
Marmont sees the threat from the Russian cavalry and moves one of his formations around the north edge of the eastern villages. The 1st Infantry Division moves towards their objective, avoiding the village and the forest. This move will carry the 1st Division around the north edge of the middle town.
Turn 4, Russian Cuirassier Division Captures a Village in the North.

Turn 4, French Cuirassiers Getting Close to the Large Town in the Middle

Turn 4, View from the Russian Side. Yes, that’s a messy desk.
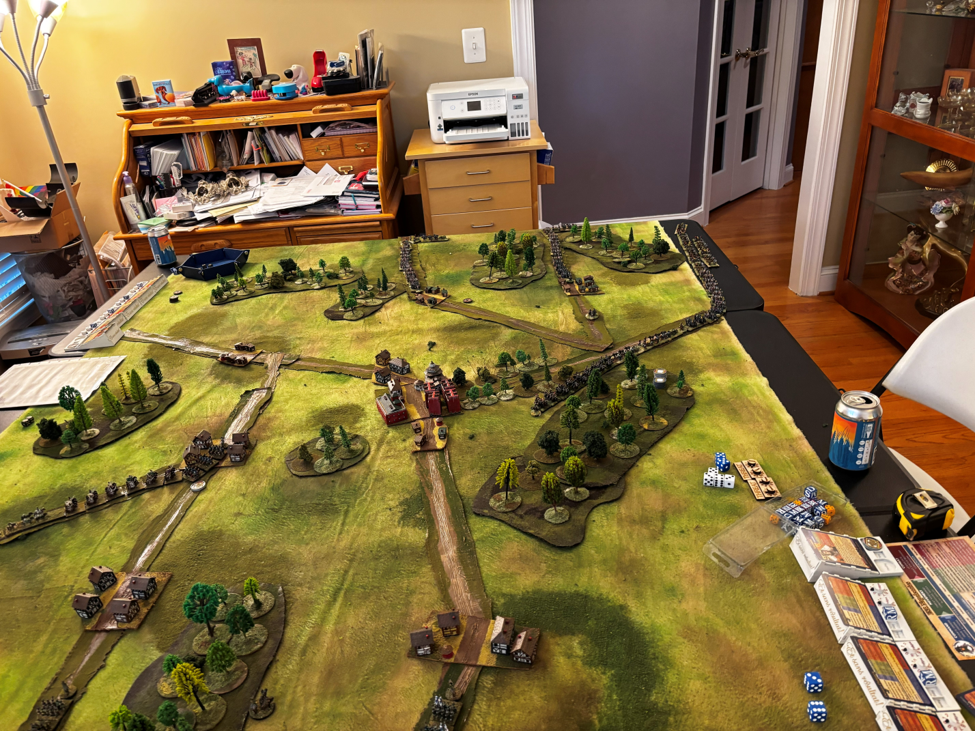
Turn 5, each side is forced to start to deploy. Bennigsen deploys the Cuirassier Division to threaten the French cavalry deployed about the town. He also directs the Grenadiers and 2nd Division to deploy as well. The 1st Division is just reaching the field and throws out a couple of battalions just to the west of the Cuirassiers. Bennigsen brings up a 6# Russian horse gun to begin shelling the French cavalry.
Marmont deploys his Cuirassiers facing two directions. To the north a few heavy cavalry stands support the Russian guns. Marmont has his horse guns deployed to bring some Threat onto the grenadiers as they advance. These horses just need to hold on a little longer. To the east, the infantry are marching as quickly as they are able but are still two miles from the middle of the table.
Turn 5, The Russian Attack Develops.
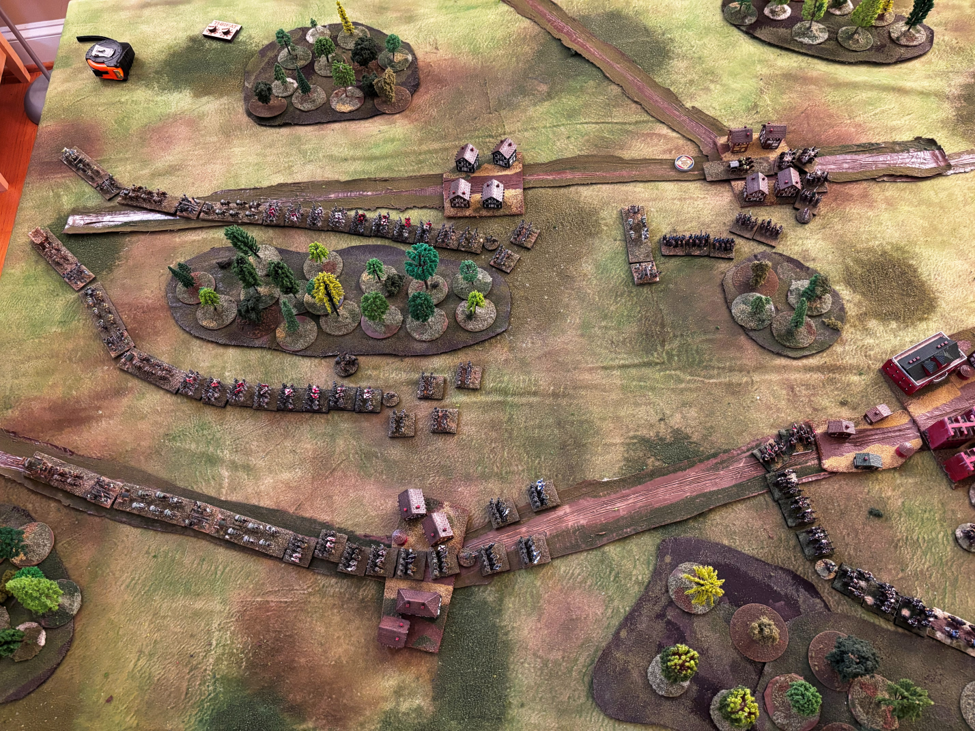
Turn 5, The French 3rd Infantry Division is Within one Move of the Town.
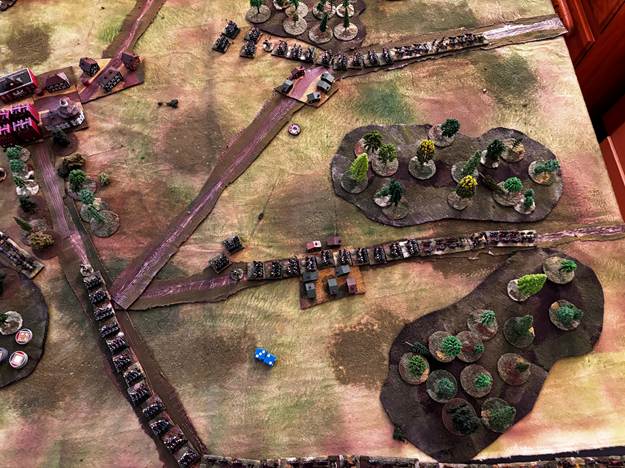
Turn 6, Marmont continues his infantry advance towards the town. He begins to deploy his light infantry at the head of the column. Note that on turn 1, Marmont placed his dummy objectives by this large town. The actual objective is place to the northwest, but is out of screen due to the number of Russian troops. The 1st Infantry Division reaches the eastern outskirts of the town. With both the 1st and the 3rd Infantry Divisions strongly positioned on either side of the town, Marmont will be able to use the 2nd Infantry Division as a mobile reserve. Marmont deploys his horse battery in front of the two Russian Formations forcing them both to stop and form lines.
Bennigsen takes this pause to solidify his lines. The grenadiers and line troops build a solid wall of bayonets and muskets while they wait for their artillery to move forward. Bennigsen directs the Cuirassiers to move to the north side of the town to delay the Friench 1st Division. The Russian 1st Division continues its trek to the battlefield but are in one move to support either the cavalry or the 2nd Division. All is going according to plan.
Turn 6, Upper Left Shows the Russian Attack Forming on the French Cuirassiers.
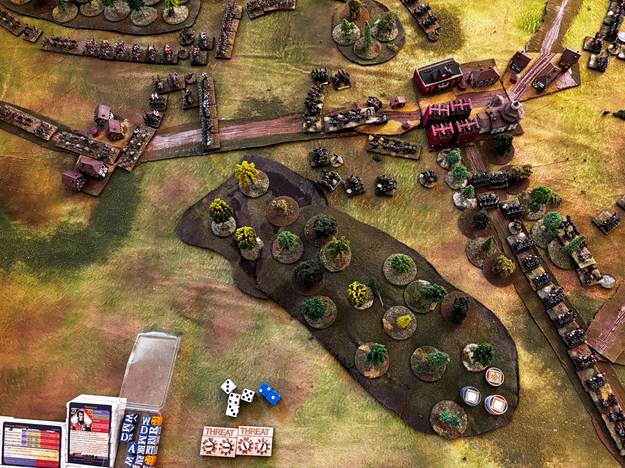
Turn 6, The French Infantry Are Ready To Engage

Turn 7, Marmont deploys his guns – all of them. He sends the light infantry into the town. The Cuirassiers forced the Russian 2nd Division and Grenadiers into a Defend directive but that will not last long. The long march of the 1st Division is nearly within volley distance of the Russian Cuirassiers. An unbroken line of infantry is the last thing these horsemen are looking forward to today.
Bennigsen acts aggressively with his grenadiers and 2nd Division. These troops push up and the French heavy cavalry withdraws in front of these bayonets. However, with the advancing French infantry, there is no advantage gained. French cavalry have been replaced by fresh French infantry.
Turn 7, French 1st Cuirassiers Trade Places with the 3rd Infantry Division
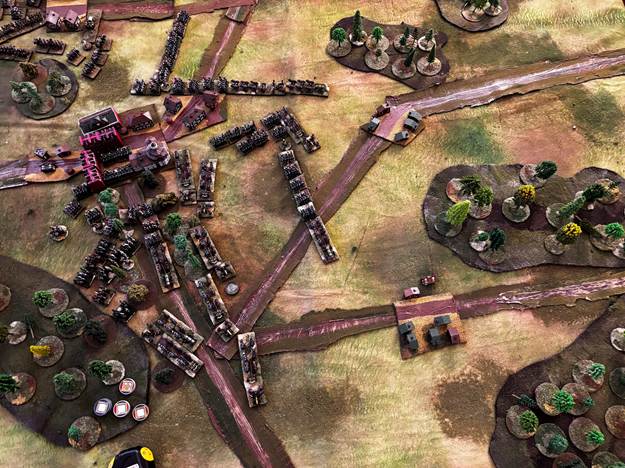
Turn 8, Marmont continues to press his 1st Infantry Division against the northern flank. The 2nd Infantry Division falls in behind in support. The Russian and French lines exchange volleys. A few battalions continue to engage the Russian cavalry to keep them off balance. The 1st Division is covering a very wide area, about the width of two Divisions. Marmont believes that his plan is coming together and his staff can run it for him. He needs to personally direct the artillery fire. He sends the 1st Cuirassier’s to the rear (now on the Defend directive). This allows them to pull completely away from the constrained area between the forest and the town.
Bennigsen deploys the 1st Division into line against the French infantry in front of him. The left flank battalions of the 2nd Division will lend support if the French cross the ground between them. He allows the Cuirassiers to disengage a bit more withdrawing them out of musketry range.
Turn 8, The Battlefield Well Developed. The French and Russian 1st Infantry Divisions Facing Off in the North.
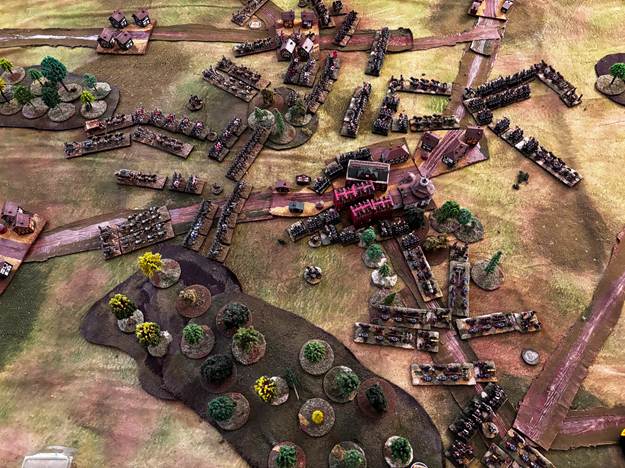
Turn 9, both sides pause to get their equipment into position. Marmont cedes part of the town to consolidate the lines of the 3rd Infantry Division. He also maneuvers the 2nd Division to the north to guard against the Russian cavalry. Bennigsen is hesitant to commit the grenadiers into the town with all of the hardware heading this way. All the Russian guns are deployed but there is limited space to deploy them.
Turn 9, The Calm Before the Storm
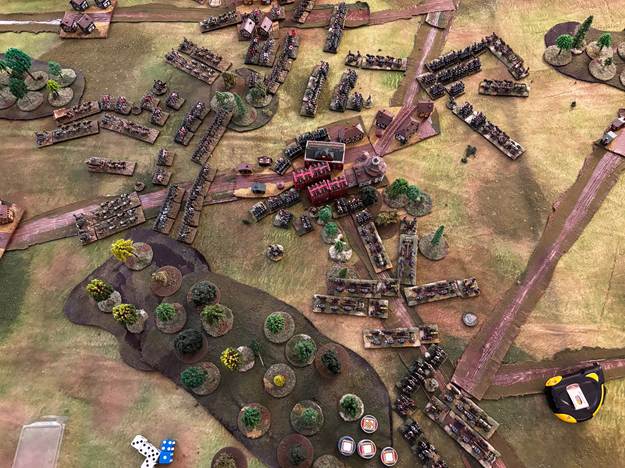
Turn 10, Marmont turns the 1st Division lose on the Russians. This Formation engages elements of the Russian 1st Cuirassier Division, 1st Infantry Division, and 2nd Infantry Division. Marmont’s 2nd Division deploys and starts a long range cannonade against the Russian cavalry. Marmont forms a grand battery to the south of the town consisting of 3 batteries, sixteen 12 pounders and eight 6 pounders rain destruction down on the Russian grenadiers. Marmont takes personal command and directs the fire of the Grand Battery resulting in extra fatigue for the gunners but extra dice against the grenadiers.
Bennigsen continues to follow his plan. The 1st Cuirassier deploys on the flank of the Frech 1st Division. The 2nd Division lends support to the 1st Division and skirmishes with the French lights in the town. The Grenadiers deploy in a solid line to make ready for melee.
Turn 10, French 1st Division is Fully Committed to the Fight with the Russian 1st, 2nd, and Cannon Fire from the Russian Cuirassiers. The French Grand Battery is South of the Town.

Turn 11, Marmont and Bennigsen both charge. Marmont sends his 1st and 2nd Divisions into the enemy to their front. Bennigsen sends tactical counter attacks from both the Grenadier Division and the 2nd Infantry Division. The 1st Infantry Division is in a sound location and stoically receives the French 1st Division charge.
In the north, the French 2nd Infantry Division engages with the Russian Cuirassier Division. There were just too many bayonets and the cavalry were forced to withdraw. The French 1st Division, still engaging with Units from both Russian infantry divisions will Break after combat.
In the south, the Russian grenadiers charge the Grand Battery commanded by Marmont. The French gunners with limited Fatigue but very little Cohesion will be forced to Withdraw. This was not without some combat loss to the Grenadiers who have been steadily acquiring Fatigue from Turn 6, two full hours engaged for the Russian Grenadiers. While the most steady men in the Force, they are tired.
In the center, the French 3rd Infantry Division engages with both the Russian 2nd Infantry Division and elements of the Grenadier Division. While the town offers some cover for the light troops of the 3rd Division, the Russians are pressing hard on them.
Turn 11, Beginning of Combat. Fighting Across the Entire Front North to South

Turn 11, The Bloody Fields – The Aftermath: French 1st Division Broken, French Grand Battery Withdrawing, Russian Cuirassiers Withdrawing, Russian 1st Division Withdrawing,

Note, in ESR when batteries limber and go to reform, they do not go back into the formation reserve, they go directly to the Reformation Area. Since the Reformation Area is 450 yards behind the last unit, they effectively receive extra movement. However, it will take multiple command rolls to get these Units rallied out of the Reformation Area and then back into the Formation reserve. This explains how the guns in front of the grenadiers moved from the middle left of the previous picture to the lower right of the picture in the current image.
Turn 12, starts with the French Force holding on. Elements are beaten, but still has some fight left in it. Marmont activates the Directives for each of his active formations. Since Marmont is in command of the Grand Battery, his command value cannot be used. Marmont rolled very, very, very well in his command rolls.
From my perspective, this turn is what makes ESR unique in the Napoleonic rule systems. It allows for the dynamic punch and haymaker that Napoleon was so famous for setting up and delivering.
Marmont makes his command rolls and activates his pending Directives on the 2nd and 3rd Divisions. Both of these divisions are going to Attack. Broken, Retreating, and Withdrawing Formations go first. Attackers and their supports move next.
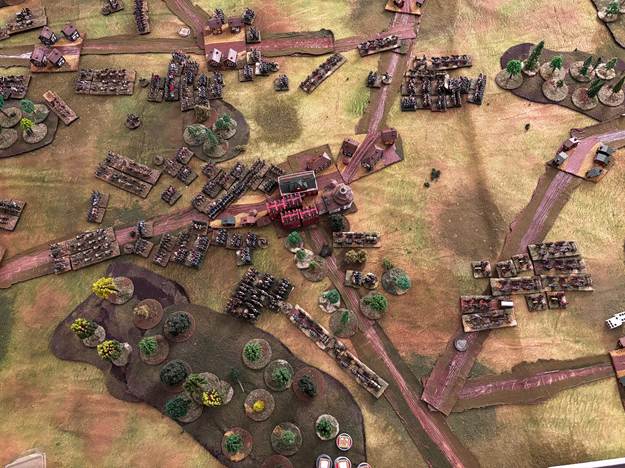
Marmont sends the 3rd Division against the Russian grenadiers and 2nd Division. The French 2nd Division goes after the Russian 1st Division. However, with the Russian cavalry is still a threat, so the Marmont’s 2nd Division must expand their frontage to keep the cavalry at bay. The French Cuirassiers, now fully rested, no Fatigue, move up into the rear of the 3rd Division. (This is the haymaker, ed.)
Bennigsen is forced to wait until the French have completed moving. The French have an Attack directive, his Defending Formation moves after. While the Grenadiers and the 1st Division withdraw first, neither was able to completely outrun the French 2nd and 3rd Divisions.
During the Combat phase, the Russian Grenadier Division broke. The Russian 1st Division retreated. At the end of the phase, the French 3rd Division which was Threatened, decided to Withdraw. This was an immediate move to the rear by this Formation. This is important so that the French 1st Cuirassier Division could change to Attack from Support. This allows the French Cuirassier Units a full move to contact an enemy Unit within movement.
Marmont’s French Cuirassier Division was able to move 4 Units into contact with the Russian 2nd Infantry Division through the gap left by the 3rd Infantry Division. From a game mechanic, the entire Combat phase is replayed but just involving these two units.
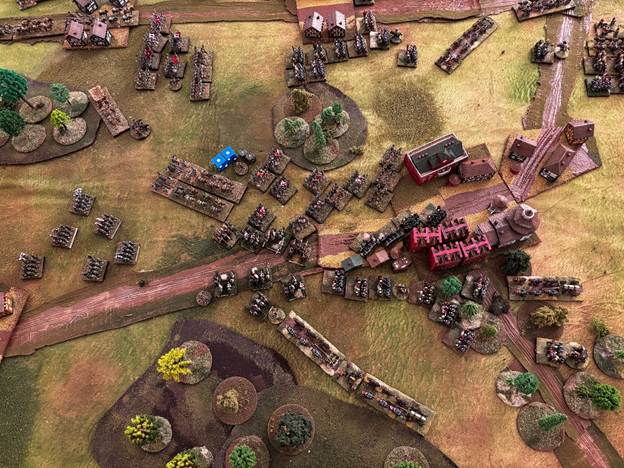
We played through 12 turns. We have thrown a lot of dice. Leader fate is the first element of the Combat phase. We didn’t have any dice rolls that were close – until this turn. The Russian 2nd Infantry Division commander was killed by a French Cuirassier.
At the end of the new Combat phase, the Cuirassiers were forced to Withdraw (still in contact at the end of combat), but the Russian Force was done. All of the Russian Formations were Withdrawing, Retreating, or Broken. It is possible that one or two more could have been Broken by the French cavalry in subsequent turns, but we ended here.
This was a fun game. I wonder if the French could pull it off without the Corps Artillery.
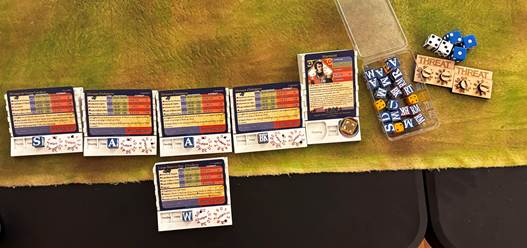
Turn 12, Command Phase Russian Side, Right to Left, Grenadier Division, 2nd Division, 1st Division, Cuirassier Division (Active Order on the Right)

Turn 12, Command Phase French Side, from Right to Left, 1st, 2nd, 3rd Division, Cuirassier Division, Bottom Grand Battery
Turn 12, French 2nd Division in the North Expands Their Frontage while the 3rd Division Attacks in the South
Turn 12, Leader Fate, ‘2’ Followed by a ‘2’. Killed Outright. No Commander Bonuses for Russian 2nd Division. Note the Broken Grenadiers on the Middle Left.
Turn 12, Game Finale. Russian Grenadiers Broken. 1st and 2nd Infantry Divisions Retreating.

-Jose Muldoon


This is fantastic!!! What a battle!!!!
LikeLiked by 1 person